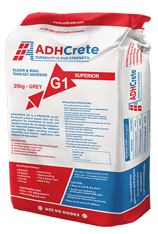
ADHCrete G1 Superior Grade
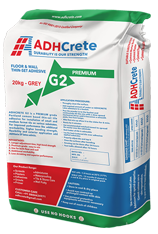
ADHCrete G2 Premium Grade
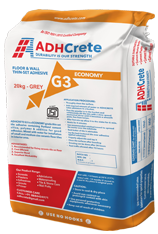
ADHCrete G3 Economy Grade
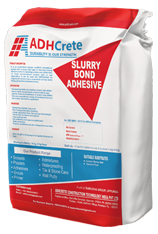
ADHCrete Slurry Bond Adhesive
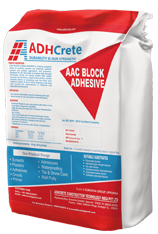
ADHCrete AAC Block Laying Adhesive
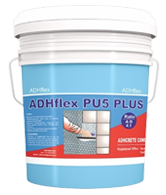
ADHCrete ADHFlex PU 5 Plus
THINSET ADHESIVES
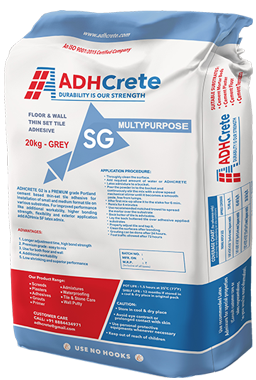
SG MULTI-PURPOSE
FLOOR & WALL THIN-SET ADHESIVE
Package: 20Kg
Color: Grey & White
Product Description
ADHCRETE SG multipurpose tile adhesive is an excellent quality specially prepared polymer modified thinset adhesive for exterior and interior installation of ceramic tile, glass tile, mosaic tile, natural stones etc on difficult substrates. ADHCrete SG Multipurpose Thinset adhesive is designed to mix with water, has a convenient open time with high adhesion and workability.
ADVANTAGES
- Multipurpose adhesive with Exceptional quality
- Use on floor and wall in interior and exterior
- Specially prepared adhesive
- Highly flexible and strong bond
- Easy mixing & smooth application
- Highly suitable for tiling on difficult substrates with longer open and adjustment time.
- Excellent mechanical property
SUITABLE SUBSTRATES
- Concrete
- Concrete Masonry
- Cement Mortar Beds
- Cement Plaster
- Ceramic Tile and Stone
- Brick Masonry
- Cement Backer Board
- Cement Terrazzo
- Exterior Grade Plywood
- Gypsum Wallboard
COVERAGE
| Trowel Size | Approx. Coverage |
|---|---|
| 1/4”×1/4”×1/4 ”(6×6×6 mm) Square notch | 50-60 Sq.ft. |
| 1/4"×3/8”×1/4”(6×9.5×6 mm) Square notch | 30-40 Sq.ft. |
| 1/2”×1/2”×1/2”(13×13×13 mm) Square notch | 20-24 Sq.ft. |
- 50 to 60 sq ft for 20 kg using 6x6x6mm square notch - for ceramic tile
- 30 to 40 sq ft for 20 kg using 6x9.5x6mm square notch - for vitrified tile
- 20 to 24 sq ft for 20 kg using 13x13x13 square notch - for stones & other larger format tile
Technical Data And Application Properties At
73° F (23° C) And 50% Relative Humidity
- SHELF LIFE: 1 Year (If It Is Stored In Cool, Dry Place In Original Pack)
- WATER DEMAND: 4.5 To 5 Litres For 20 Kg Powder
- OPEN TIME: Approximately 30 Min
- ADJUSTMENT TIME: Approximately 30 Min
- POT LIFE: Approximately 4-6 Hours
- SHEAR BOND STRENGTH (28 DAYS) Minimum 325 PSI/2.24N/Mm2
- COMPRESSIVE STRENGTH (28 DAYS) Minimum 3200 PSI/22.06N/Mm2
- TIME FOR LIGHT FOOT TRAFFIC 6 Hours
- TIME FOR NORMAL FOOT TRAFFIC 24 Hours
- TIME FOR HEAVY FOOT TRAFFIC 72 Hours
- TIME BEFORE GROUTING 24 Hours
Installation Instructions
Proper surface preparation is essential for the correct installation of any floor covering. Surface must be structurally sound, smooth, and dry. Glossy or painted surfaces must be sanded, stripped and cleaned of waxes, dust grease, loose material and any other contamination, which may interface with good bond. Surface temperature should be maintained between 10° C to 38° C for good adhesion. Concrete bricks/blocks /wall to dry out by exposure to air for at least 28 days.
The standard mixing ratio is 4.5 to 5 litres for 20 kg. Put clean water or recommended latex admixture in the mixing container first, then add ADHCrete thinset adhesive. For best result, mix with mixing paddle and 1/2” heavy–duty drill. To mix by hand, use a margin trowel and mix vigorously with hand or slow speed mixer until it's obtain a homogeneous lump free paste. Let the properly mixed adhesive to slake for 4 to 5 minutes. Remix again for 2 minutes and apply with the recommended notched trowel. Properly consistence mixed material will settle in the substrates in the form of strips (ridges) without slump when it is applied on substrates.
Use properly sized notched on trowel to ensure 100% coverage under a tile. Wet the substrate floor or wall slightly before applying the adhesive mixture. Apply thin bond coat of the mortar to the substrate with flat edge of the trowel approximately 3mm thickness. Comb the mixture with the notched edge of the trowel working in 0 one direction at 45° angle. If possible, spread in approximately one square meter at a time. Only apply as much adhesive mixture as can be covered with tiles within a open time. Check open time by touching the adhesive bed with your fingertip because open time will be vary depends on temperature and humidity. Position tiles in the adhesive bed and press the tile firmly in a perpendicular motion across ridged moving back and forth because it is allowing maximum coverage. Back buttering advisable for some tile. Adjust tile promptly and beat in with a beating block and (wooden hammer)rubber mallet. Periodically pull up tile & check back to ensure proper adhesive coverage. If material is dry or not sticky, recomb with notched trowel. If too dry, remove & replace with fresh material.
ADHCrete SG Multi-Purpose

ADHCrete G2 Premium Grade

ADHCrete G3 Economy Grade

ADHCrete Slurry Bond Adhesive

ADHCrete AAC Block Laying Adhesive

ADHCrete ADHFlex PU 5 Plus

THINSET ADHESIVES
G1 Superior Grade
HIGH PERFORMANCE FLOOR & WALL TILE ADHESIVE
Package: 20Kg
Color: Grey & White
Product Description
ADHCrete G1 is excellent performance polymer modified thinset adhesive with non-sag property and high mechanical property. This is highly preferable for fixing large format tiles and natural stone for floor and wall application. You can mix with ADHCRETE SF Latex Admix for improved flexibility and high bond strength of tile or stone on special grade plywood. Polymer modified to provide a strong bond onto tiles with low porosity.
Product Application
Designed for floor and wall interior and exterior application; mix with ADH Mix SF Latex Admix for higher bonding strength and flexibility.
Technical Data And Application Properties At
73° F (23° C) And 50% Relative Humidity
- SHELF LIFE: 1 Year (If It Is Stored In Cool, Dry Place In Original Pack)
- WATER DEMAND: 8 Litres For 20 Kg Powder
- OPEN TIME: Approximately 20 Min
- POT LIFE: Approximately 4 Hours
- SHEAR BOND STRENGTH PORCELAIN TILE (28 DAYS) : Minimum 300PSI
- SHEAR BOND STRENGTH PORCELAIN TILE IN WATER IMMERSION (28 DAYS) - Minimum 190 PSI
- COMPRESSIVE STRENGTH (28 DAYS) : Minimum 2850 PSI
- TIME FOR NORMAL FOOT TRAFFIC 24 Hours
COVERAGE
| Trowel Size | Approx. Coverage |
|---|---|
| 1/4”×1/4”×1/4 ”(6×6×6 mm) Square notch | 50-60 sq.ft. |
| 1/4"×3/8”×1/4”(6×9.5×6 mm) Square notch | 30-40 sq.ft. |
| 1/2”×1/2”×1/2”(13×13×13 mm) Square notch | 20-24 sq.ft. |
- 50 to 60 sq ft for 20 kg using 6x6x6mm square notch - for ceramic tile
- 30 to 40 sq ft for 20 kg using 6x9.5x6mm square notch - for vitrified tile
- 20 to 24 sq ft for 20 kg using 13x13x13 square notch - for stones & other larger format tile
Installation Instructions
Proper surface preparation is essential for the correct installation of any floor covering. Surface must be structurally sound, smooth, and dry. Glossy or painted surfaces must be sanded, stripped and cleaned of waxes, dust grease, loose material and any other contamination, which may interface with good bond. Surface temperature should be maintained between 10° C to 38° C for good adhesion. Concrete bricks/blocks/wall to dry out by exposure to air for at least 28 days.
The standard mixing ratio is 4.5 to 5 litres for 20 kg. Put clean water or recommended latex admixture in the mixing container first, then add ADHCrete thinset adhesive. For best result, mix with mixing paddle and 1/2” heavy–duty drill. To mix by hand, use a margin trowel and mix vigorously with hand or slow speed mixer until it's obtain a homogeneous lump free paste. Let the properly mixed adhesive to slake for 4 to 5 minutes. Remix again for 2 minutes and apply with the recommended notched trowel. Properly consistence mixed material will settle in the substrates in the form of strips (ridges) without slump when it is applied on substrates.
Use properly sized notched on trowel to ensure 100% coverage under a tile. Wet the substrate floor or wall slightly before applying the adhesive mixture. Apply thin bond coat of the mortar to the substrate with flat edge of the trowel approximately 3mm thickness. Comb the mixture with the notched edge of the trowel working in 0 one direction at 45° angle. If possible, spread in approximately one square meter at a time. Only apply as much adhesive mixture as can be covered with tiles within a open time. Check open time by touching the adhesive bed with your fingertip because open time will be vary depends on temperature and humidity. Position tiles in the adhesive bed and press the tile firmly in a perpendicular motion across ridged moving back and forth because it is allowing maximum coverage. Back buttering advisable for some tile. Adjust tile promptly and beat in with a beating block and (wooden hammer)rubber mallet. Periodically pull up tile & check back to ensure proper adhesive coverage. If material is dry or not sticky, recomb with notched trowel. If too dry, remove & replace with fresh material.

ADHCrete SG Multi-Purpose

ADHCrete G1 Superior Grade

ADHCrete G3 Economy Grade

ADHCrete Slurry Bond Adhesive

ADHCrete AAC Block Laying Adhesive

ADHCrete ADHFlex PU 5 Plus

THINSET ADHESIVES
G2 Premium Grade
FLOOR & WALL THIN-SET ADHESIVE
Package: 20kg
Color: Grey & White
Product Description
ADHCRETE G2 is a PREMIUM grade Portland cement based thinset mortar for installation of small and medium format tile on various substrates. For fixing large format tile, improved performance like additional workability, higher bonding strength, flexibility and fixing large format tile in exterior application add ADHmix SF latex admix.
Product Application
Designed for floor and wall, small and medium format tile for interior and exterior application. Mix with ADHmix SF latex admix for large format tile for exterior application.
ADVANTAGES
- Longer adjustment time, High bond strength
- Premium grade, easy to mix
- Use for both floor and wall
- Additional workability
- Low shrinking and superior performance
- Complies National and International standard
SUITABLE SUBSTRATES
- Cement Mortar bed
- Cement Plaster
- Cement Floor
- Cement Terrazzo
COVERAGE
| Trowel Size | Approx. Coverage |
|---|---|
| 1/4”×1/4”×1/4 ”(6×6×6 mm) Square notch | 50-60 Sq.ft. |
| 1/4"×3/8”×1/4”(6×9.5×6 mm) Square notch | 30-40 Sq.ft. |
| 1/2”×1/2”×1/2”(13×13×13 mm) Square notch | 20-24 Sq.ft. |
- 50 to 60 sq ft for 20 kg using 6x6x6mm square notch - for ceramic tile
- 30 to 40 sq ft for 20 kg using 6x9.5x6mm square notch - for vitrified tile
- 20 to 24 sq ft for 20 kg using 13x13x13 square notch - for stones & other larger format tile
Technical Data and Application Properties at
73° F (23° C) and 50% Relative Humidity
- SHELF LIFE: 1 Year (If It Is Stored In Cool, Dry Place In Original Pack)
- WATER DEMAND: 4.5 To 5 Litres For 20 Kg Powder
- OPEN TIME: Approximately 15 Min
- ADJUSTMENT TIME: Approximately 15 Min
- POT LIFE: Approximately 3 Hours
- SHEAR BOND STRENGTH (28 DAYS) Minimum 260 PSI/1.79N/Mm2
- COMPRESSIVE STRENGTH (28 DAYS)Minimum 2500 PSI/17.23N/Mm2
- TIME FOR LIGHT FOOT TRAFFIC 6 Hours
- TIME FOR NORMAL FOOT TRAFFIC 24 Hours
- TIME FOR HEAVY FOOT TRAFFIC 72 Hours
- TIME BEFORE GROUTING 24 Hours
Installation Instructions
Proper surface preparation is essential for the correct installation of any floor covering. Surface must be structurally sound, smooth, and dry. Glossy or painted surfaces must be sanded, stripped and cleaned of waxes, dust grease, loose material and any other contamination, which may interface with good bond. Surface temperature should be maintained between 10° C to 38° C for good adhesion. Concrete bricks/blocks/wall to dry out by exposure to air for at least 28 days.
The standard mixing ratio is 4.5 to 5 litres for 20 kg. Put clean water or recommended latex admixture in the mixing container first, then add ADHCrete thinset adhesive. For best result, mix with mixing paddle and 1/2” heavy–duty drill. To mix by hand, use a margin trowel and mix vigorously with hand or slow speed mixer until it's obtain a homogeneous lump free paste. Let the properly mixed adhesive to slake for 4 to 5 minutes. Remix again for 2 minutes and apply with the recommended notched trowel. Properly consistence mixed material will settle in the substrates in the form of strips (ridges) without slump when it is applied on substrates.
Use properly sized notched on trowel to ensure 100% coverage under a tile. Wet the substrate floor or wall slightly before applying the adhesive mixture. Apply thin bond coat of the mortar to the substrate with flat edge of the trowel approximately 3mm thickness. Comb the mixture with the notched edge of the trowel working in 0 one direction at 45° angle. If possible, spread in approximately one square meter at a time. Only apply as much adhesive mixture as can be covered with tiles within a open time. Check open time by touching the adhesive bed with your fingertip because open time will be vary depends on temperature and humidity. Position tiles in the adhesive bed and press the tile firmly in a perpendicular motion across ridged moving back and forth because it is allowing maximum coverage. Back buttering advisable for some tile. Adjust tile promptly and beat in with a beating block and (wooden hammer)rubber mallet. Periodically pull up tile & check back to ensure proper adhesive coverage. If material is dry or not sticky, recomb with notched trowel. If too dry, remove & replace with fresh material.

ADHCrete SG Multi-Purpose

ADHCrete G1 Superior Grade

ADHCrete G2 Premium Grade

ADHCrete Slurry Bond Adhesive

ADHCrete AAC Block Laying Adhesive

ADHCrete ADHFlex PU 5 Plus

THINSET ADHESIVES
G3 Economy Grade
FLOOR & WALL THIN-SET ADHESIVE
Package: 10, 20 kg and 30 kg
Color: Grey
Product Description
Economy grade POLYMER-modified dry set mortar containing Portland cement, silica, polymer & additive for good adhesion. Mixed with water for installation of small and medium size ceramic floor tiles in interior area.
Product Application
Designed for floor and wall interior application
ADVANTAGES
- Recommended for fixing ceramic tile on floor
- Cost efficient
- Superior bond
- Excellent workability
- Complies National and International Standard
SUITABLE SUBSTRATES
- Cement Mortar bed
- Cement Plaster
- Cement Floor
- Cement Terrazzo
COVERAGE
| Trowel Size | Approx. Coverage |
|---|---|
| 1/4”×1/4”×1/4 ”(6×6×6 mm) Square notch | 50-60 Sq.ft. |
| 1/4"×3/8”×1/4”(6×9.5×6 mm) Square notch | 30-40 Sq.ft. |
| 1/2”×1/2”×1/2”(13×13×13 mm) Square notch | 20-24 Sq.ft. |
- 50 to 60 sq ft for 20 kg using 6x6x6mm square notch - for ceramic tile
- 30 to 40 sq ft for 20 kg using 6x9.5x6mm square notch - for vitrified tile
- 20 to 24 sq ft for 20 kg using 13x13x13 square notch - for stones & other larger format tile
Technical Data and Application Properties at
73° F (23° C) and 50% Relative Humidity
- SHELF LIFE: 1 Year (If It Is Stored In Cool, Dry Place In Original Pack)
- WATER DEMAND: 4.5 To 5 Litres For 20 Kg Powder
- OPEN TIME: Approximately 15 Min
- ADJUSTMENT TIME: Approximately 15 Min
- POT LIFE: Approximately 3 Hours
- SHEAR BOND STRENGTH (28 DAYS) Minimum 240 PSI/1.65N/Mm2
- COMPRESSIVE STRENGTH (28 DAYS) Minimum 2200 PSI/15.16N/Mm2
- TIME FOR LIGHT FOOT TRAFFIC 6 Hours
- TIME FOR NORMAL FOOT TRAFFIC 24 Hours
- TIME FOR HEAVY FOOT TRAFFIC 72 Hours
- TIME BEFORE GROUTING 24 Hours
Installation Instructions
Proper surface preparation is essential for the correct installation of any floor covering. Surface must be structurally sound, smooth, and dry. Glossy or painted surfaces must be sanded, stripped and cleaned of waxes, dust grease, loose material and any other contamination, which may interface with good bond. Surface temperature should be maintained between 10° C to 38° C for good adhesion. Concrete bricks/blocks/wall to dry out by exposure to air for at least 28 days.
The standard mixing ratio is 4.5 to 5 litres for 20 kg. Put clean water or recommended latex admixture in the mixing container first, then add ADHCrete thinset adhesive. For best result, mix with mixing paddle and 1/2” heavy–duty drill. To mix by hand, use a margin trowel and mix vigorously with hand or slow speed mixer until it's obtain a homogeneous lump free paste. Let the properly mixed adhesive to slake for 4 to 5 minutes. Remix again for 2 minutes and apply with the recommended notched trowel. Properly consistence mixed material will settle in the substrates in the form of strips (ridges) without slump when it is applied on substrates.
Use properly sized notched on trowel to ensure 100% coverage under a tile. Wet the substrate floor or wall slightly before applying the adhesive mixture. Apply thin bond coat of the mortar to the substrate with flat edge of the trowel approximately 3mm thickness. Comb the mixture with the notched edge of the trowel working in 0 one direction at 45° angle. If possible, spread in approximately one square meter at a time. Only apply as much adhesive mixture as can be covered with tiles within a open time. Check open time by touching the adhesive bed with your fingertip because open time will be vary depends on temperature and humidity. Position tiles in the adhesive bed and press the tile firmly in a perpendicular motion across ridged moving back and forth because it is allowing maximum coverage. Back buttering advisable for some tile. Adjust tile promptly and beat in with a beating block and (wooden hammer)rubber mallet. Periodically pull up tile & check back to ensure proper adhesive coverage. If material is dry or not sticky, recomb with notched trowel. If too dry, remove & replace with fresh material.

ADHCrete SG Multi-Purpose

ADHCrete G1 Superior Grade

ADHCrete G2 Premium Grade

ADHCrete G3 Economy Grade

ADHCrete AAC Block Laying Adhesive

ADHCrete ADHFlex PU 5 Plus
THINSET ADHESIVES
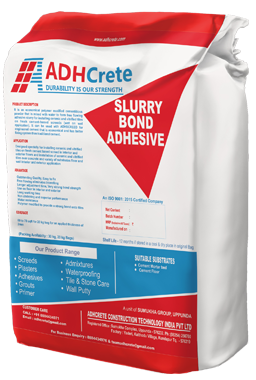
ADHCRETE SLURRY BOND ADHESIVE
Package: 30kg. and 50kg.
Color: Grey and White
Coverage: 60 to 70 sqft for 20 kg bag for an applied thickness of 2mm
Product Description
It is an economical polymer modified cementitious powder that is mixed with water to form free flowing adhesive slurry for installing ceramic and vitrified tiles on fresh cement-based screeds (wet on wet application). It can be used with ADHSCREED for engineered cement that is economical and has better fixing system than traditional cement.
Product Application
Designed specially for installing ceramic and vitrified tiles on fresh cement based screed in interior and exterior floors and installation of ceramic and vitrified tiles over concrete and variety of substrates floor and wall interior and exterior application


ADVANTAGES
- One component, Very high mechanical property
- High strength, water retaining and self curing.
- No shrinkage.
- Shock and impact resistancy.
- Easy to mix with water or latex.
- Flexibility to mix with locally available sand.
- Easy to use special tools not required
- Retains the dimensional stability of the screed.
SUITABLE SUBSTRATES
- Concrete blocks
- Aerated light weight blocks
- Fly ash bricks
- Cement mortar blocks/bricks
- Concrete hollow block
- Cellular concrete blocks.
Technical Data and Application Properties at
73° F (23° C) and 50% Relative Humidity
- SHELF LIFE: 1 Year (If It Is Stored In Cool, Dry Place In Original Pack)
- WATER DEMAND: 8 Litres For 20 Kg Powder
- OPEN TIME: Approximately 20 Min
- POT LIFE: Approximately 4 Hours
- SHEAR BOND STRENGTH PORCELAIN TILE (28 DAYS) : Minimum 300PSI
- SHEAR BOND STRENGTH PORCELAIN TILE IN WATER IMMERSION (28 DAYS) - Minimum 190 PSI
- COMPRESSIVE STRENGTH (28 DAYS) : Minimum 2850 PSI
- TIME FOR NORMAL FOOT TRAFFIC 24 Hours
Installation Instructions
Proper surface preparation is essential for the correct installation of any floor covering. Surface must be structurally sound, smooth, and dry. Glossy or painted surfaces must be sanded, stripped and cleaned of waxes, dust grease, loose material and any other contamination, which may interface with good bond. Surface temperature should be maintained between 10°C to 38°C for good adhesion. Rough or uneven concrete surface should be mad smooth with ADHScreed autocure for better finish. Installation can be made on wet screed surface. New concrete slabs shall be cured for 28 days before application.
The standard mixing ratio is 8L for 20 kg. Put clean water in the mixing container first, then add ADHCRETE Slurry bond adhesive. For best result, mix with mixing paddle and 1/2” heavy –duty drill. To mix by hand, use a margin trowel and mix vigorously with hand or slow speed mixer until it’s obtain a homogeneous lump free flowing consistency. Let the properly mixed adhesive to slake for 5 to 10 minutes. Remix again for 2 minutes and apply
Pour ADHCRETE Slurry bond adhesive over fresh ADHScreed AUTOCURE. ADHCRETE Slurry bond adhesive can be applied directly on the cement based screed while it is still fresh. Spread the slurry uniformly to form a thickness of 2mm. Position tiles in to wet sticky adhesive bed and press the tile firmly in a perpendicular motion across ridged moving back and forth because it is allowing maximum coverage. Adjust tile promptly and beat in with a beating block and (wooden hammer) rubber mallet. Periodically pull up tile & check back to ensure proper adhesive coverage and bedding adhesive transfer on to back of tile. Only apply as much adhesive mixture as can be covered with tiles within a open time. Check open time by touching the adhesive bed with your fingertip because open time will be vary depends on temperature and humidity. Excess adhesive must be removed from the surface of the tile and clean with wet cloth or sponge while adhesive fresh and has not hardened.

ADHCrete SG Multi-Purpose

ADHCrete G1 Superior Grade

ADHCrete G2 Premium Grade

ADHCrete G3 Economy Grade

ADHCrete Slurry Bond Adhesive

ADHCrete ADHFlex PU 5 Plus

ADHCRETE AAC BLOCK LAYING ADHESIVE
Package: 30Kg and 50Kg
Product Description
AAC BLOCK LAYING ADHESIVE is a factory prepared blend of carefully selected raw materials, portland cement and graded aggregates and polymers. Designed for mix with water to produce high strength thixotropic mortar, for laying aerated light weight concrete, fly ash bricks, cement hollow blocks, cellular concrete blocks or smoothing over the block work surface in layers of up to 12mm thickness, that meet and exceed the requirements of National and International Standards
Product Application
For interior and exterior use for preparing thin bed block mortar for alc and cellular concrete blocks
ADVANTAGES
- Premixed Ready to use, only need to add water at site
- High Water Retention Capability
- High Bonding Strength due to Polymer Modification of Mortar.
- No Curing
- Thin Joint Application Prevent Shrinkage Cracks.
- Due to Premixed its save times for lengthy process like mixing materials, transport and separate inventory of material.
- Plastering can be done after 24 hrs. of application.
SUITABLE SUBSTRATES
- Concrete blocks
- Aerated light weight blocks
- Fly ash bricks
- Cement mortar blocks/bricks
- Concrete hollow block
- Cellular concrete blocks
COVERAGE
| THICKNESS | For 30 kg | For 50 kg |
|---|---|---|
| 3MM | 85 Sq.ft. | 135 Sq.ft. |
| 6MM | 40 Sq.ft. | 70 Sq.ft. |
| 9MM | 30 Sq.ft. | 50 Sq.ft. |
- Coverage shown in the chart only for reference actual may vary depending on site condition
Technical Data and Application Properties at
73° F (23° C) and 50% Relative Humidity
- SHELF LIFE: 1 Year (If It Is Stored In Cool, Dry Place In Original Pack)
- WATER DEMAND: 7.5 To 8.5 Litres For 30 Kg Powder
- OPEN TIME: Approximately 15 Min
- ADJUSTMENT TIME: Approximately 15 Min
- POT LIFE: Approximately 4 Hours
- SHEAR BOND STRENGTH (28 DAYS) Minimum 250 PSI/1.72N/Mm2
- COMPRESSIVE STRENGTH (28 DAYS) Minimum 2200 PSI/15.16N/Mm2
Installation Instructions
Proper surface preparation is essential for the correct installation of any floor covering. Surface must be structurally sound, smooth, and dry. Glossy or painted surfaces must be sanded, stripped and cleaned of waxes, dust grease, loose material and any other contamination, which may interface with good bond. Surface temperature should be maintained between 10° C to 38° C for good adhesion. Concrete bricks/blocks /wall to dry out by exposure to air for at least 28 days.
The standard mixing ratio is 7.5 to 8.5 ltrs of water for 30 kg. Put clean water or recommended latex admixture in the mixing container first, then add ADHCRETE AAC BLOK LAYING ADHESIVE. For best result, mix with mixing paddle and 1/2” heavy-duty drill. To mix by hand, use a margin trowel and mix vigorously. Mix with hand or slow speed mixer until its obtain a homogeneous lump free paste. Let the properly mixed adhesive to slake for 4 to 5 minutes. Remix again for 2 minutes and apply with the recommended notched trowel. Properly consistence mixed material will settle in the substrates in the form of strips (ridges) without slump when it is applied on substrates.
1)Thin bed mortar for laying blocks: Before placing mortar, ensure the block work to be dry and surfaces cleaned properly. Use properly seized notched on trowel to ensure 100% coverage under a block. Place the mixed mortar on the block work in thin layers of 2 to 3 mm (or as required by engineers at site) using trowel and place the next layer of blocks on the mortar. Keep joints between the blocks as required by the site engineers and fill the joints with the mixed mortar, using a trowel. Check the plumb of the wall while laying the blocks to keep the walls perfectly vertical to the plumb.
2) Smoothing over the block work: Before placing mixed mortar, apply a bonding layer of 1 to 2mm thick AAC Block Adhesive mortar using a trowel pressing down on the block work. Then apply AAC Block Adhesive at a thickness of 8 to 10mm and smoothen using a sponge or rubber / wooden float
3) Installation of Tiles: It can be used as thin-set adhesive to install tiles on Block /brick walls. Use proper notch trowel to installation of tiles and stone on the wall.
If possible, spread in approximately one square meter at a time. Only apply as much adhesive mixture as can be covered with tiles within a open time. Check open time by touching the adhesive bed with your fingertip because open time will be vary depends on temperature and humidity.
Plastering: Plumb, square and true concrete block wall can be finished with the applications of ADHCRETE readymade plaster.

ADHCrete SG Multi-Purpose

ADHCrete G1 Superior Grade

ADHCrete G2 Premium Grade

ADHCrete G3 Economy Grade

ADHCrete Slurry Bond Adhesive

ADHCrete ADHFlex PU 5 Plus
ADHCRETE ADHFLEX PU 5 PLUS
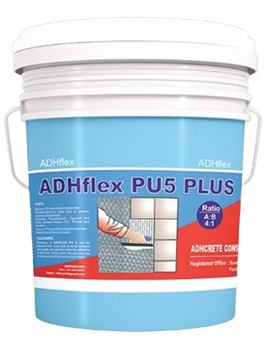
Package: 4Kg
Product Description
ADHFLEX PU 5 is a Two-part polyurethane multipurpose adhesive for fixing all types of tiles and stones on a variety of substrates in interior and exterior areas on either walls or floor. It is suitable for fixing tiles/ stones over diverse surfaces like cement-based substrate, metal substrates, epoxy/ PU based substrate, drywall boards, Rubber, PVC, plywood, wood derivative and highly deformable & expandable, absorbent & non-absorbent substrates.
USES
- Epoxy or PU resin based substrates Wooden/plywood table tops to achieve waterproof substrate
- Plywood
- Plasterboards
- Gypsum and Fibre cement boards PVC
- Rubber and linoleum Epoxy or Polyurethane based substrates Metal
- wood floor and walls
ADVANTAGES
- Long open time - suitable for large format & external condition too
- Bonds to various substrates including metals
- Sustains heat ageing - Idea for external & high temperature applications
- Highly flexible adhesive - sustains heavy vibrations
- Chemical resistant & resistance to solvents, alkalis & oils
- Suitable for multiple substrates including glass, metals, drywalls & plywood
- Suitable for fixing all tiles/ stones including composites, artificial stones, metal & glass tiles
Two components; just mix and use
SUBSTRATE PREPARATION
Substrates must be compact and consistent, free from any rising dampness, with no loose, flaky, or imperfectly anchored parts. The substrate must be stable, without cracks and have already completed the curing period of hygrometric shrinkage. Uneven areas must be corrected with suitable smoothing and finishing products. Installation shall be made on a dry surface. New concrete slabs must be damp cured and at least 28 days old prior to application. All surfaces must be plumb and true to within 6 mm in 10 ft (3m). Do not apply to substrates that have a 0 0 temperature of less than 12°C or greater than 40°C.
PERFORMANCE PROPERTIES
AS PER ISO 13007 AND EN 12004 (R2T)
| Testing Properties | Requirements | Test Results |
|---|---|---|
| Initial shear adhesion strength | ≥ 2.0 N/mm2 | ≥ 5.0 N/mm2 |
| Shear adhesion strength after water immersion | ≥ 2.0 N/mm2 | ≥ 5.0 N/mm2 |
| Shear adhesion strength after thermal shock | ≥ 2.0 N/mm2 | ≥ 5.0 N/mm2 |
| Tensile adhesion - Open time (at 60 minutes) | ≥ 1.0 N/mm2 | ≥ 1.5 N/m m2 |
| Slip resistance (T) | ≤ 0.50 mm | ≤ 0.20 mm |
STORAGE AND SHELF LIFE
ADHFLEX PU 5 has a shelf life of 12 months when stored in normal dry conditions
PRECAUTIONS
Keep out of reach of children. Wear suitable protective clothing, gloves and eyes/face protection. After contact with skin, wash immediately with plenty of clean water. In case of contact with eyes rinse immediately with plenty of clean water and seek medical advice.
TECHNICAL INFORMATION
Product Appearance
| Mixed Material Appearance | Off White Paste |
| Mixed Density | 1.65 ± 0.1 kg/ liter |
| Open Time Min | 60 minutes |
| Adjustability Min | 60 minutes |
| Pot Life Min | 60 minutes |
| Sag/ Slip | ≤ 0.3 mm |
| Application Temperature | 10° C to 40° C |
| Resistance to temperature | –40° C to +100° C |
| Trafficable/ Grouting Time | 24 hours Interval before normal use |
Add Part B to Part A and mix with a drill and paddle on a slow speed until a homogenous and uniform coloured paste is achieved.
Spread the mixed adhesive using a suitable notched trowel of the type and dimensions most appropriate for the format and type of tiles used. Apply the mix evenly as much material that can be tiled within the product's working time. Place the tiles and adjust to the correct position. Do not apply to substrates that have a 0 0 temperature of less than 12 C or greater than 40 C. ARDIFLEX PU 5 PLUS should not be used on the substrate having rising moisture problem or moisture content of more than 4%. Back butter large format tiles to provide full bedding and firm support. Place tiles into wet, sticky adhesive and tamp using a beating block or rubber mallet to fix tile and adjust level.
Residues of ADHFLEX PU 5 PLUS can be cleaned from tools and covered surfaces with water and alcohol while the adhesive is still fresh. Once cured, the adhesive can only be removed by mechanical means.
Grouting should be carried out after 24 hours of tiling. Use the appropriate grouting material from ADHCRETE range of cementitious and epoxy grouts.
For Business inquiry fill our form and Toll Free Number +91 888 443 4971


